Measurements + Free Template
The Facebook profile picture comes in at 160 x 160 pixels, while the cover photo size is 851 x 315. You can click on the image below to here’s the direct download our free template, which I will be using for this tutorial.
Get Started with Your Facebook Timeline
Out on the web, there are many inspirations which you can find to help you get a cover photo idea. Most covers play with the perspective and background utilizing a “picture-in-picture” effect. Find your inner designer, form your idea and take all the photos you need before going into Photoshop.
Photoshop Time
After you download our template, the first thing you want to do — after placing it in the folder with all your favorite files — is to open it in Photoshop. This is what it should look like:
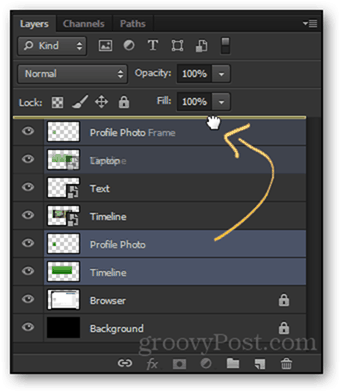
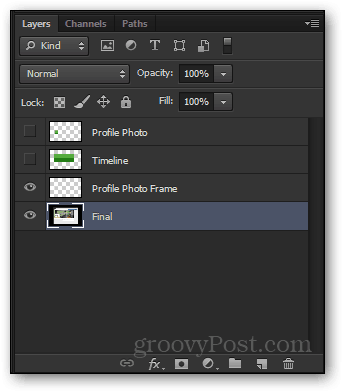
I’ll immediately direct your attention to the Layers Panel, where most of the action will be going on. The template consists of five layers. Two of these you shouldn’t touch (that’s why they’re locked) and three others you’ll be using.
While working on your timeline, you want to place the layers between the Profile Photo Frame layer and the Profile Photo layer. You can see the reason behind this in the screencast at the bottom of the article.
You can make your timeline in any way you want. You can can and should with everything you’ve got. If you’re feeling creative, but don’t know how to accomplish a certain task in Photoshop, feel free to ask us over at GroovyAnswers! or to look at our other Photoshop tutorials. Here’s mine:
And here’s what my Layers panel looks like:
Exporting
Exporting your Facebook timeline is where things get a bit tricky. Follow the steps here closely to avoid having your timeline incorrectly aligned. Start by moving the Profile Photo and Timeline layers that came with the template to the top.
And then disabling them.
Now select all layers below Profile Photo Frame with Ctrl + Click.
Then do a Right Click > Merge Layers.
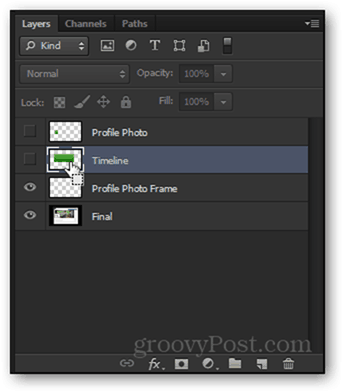
Rename your merged layer if you want to. I’ll call mine “Final”.
For more check out page 2 We can now proceed to exporting the two separate images. To export the profile photo, press and hold Ctrl and Click on the Layer Thumbnail of Profile Photo.
Then Click on the Final layer to select it.
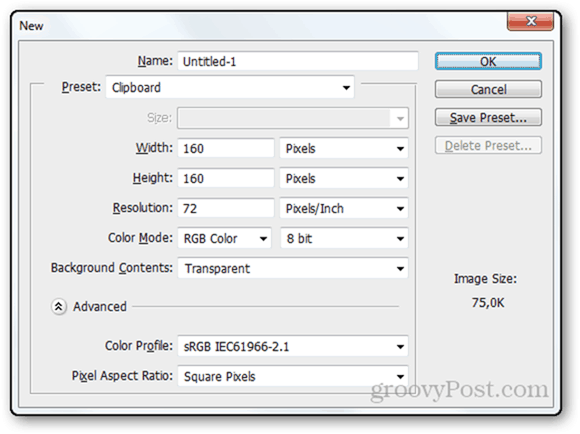
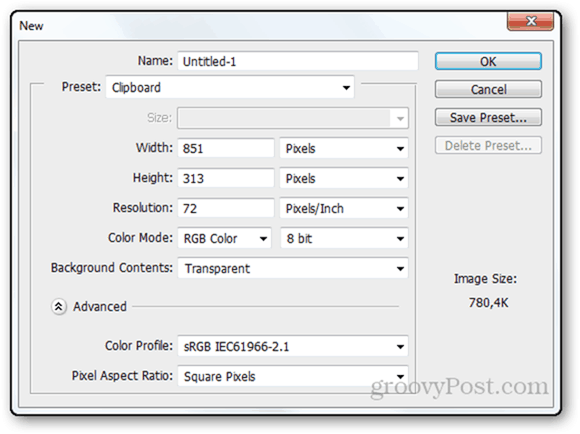
Press Ctrl + C to copy followed by Ctrl + N to open a new document.
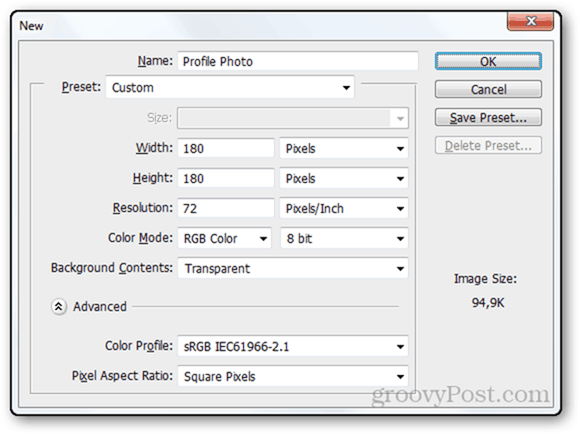
While the displayed profile picture size is 160 x 160 in size, Facebook is really pretentious and wants profile photos at a minimum size of 180 x 180. Let’s play along and give this new document the changes in needs.
Much better. Now I’ll press OK, and immediately slam my fingers on Ctrl + V afterwards to paste my profile photo.
At first, it won’t fit the 180 x 180 frame perfectly, but hey – that’s what scaling is for. Press Ctrl + T to transform the newly pasted picture and use the anchor points to make it fit the image dimensions perfectly.
Press Ctrl + Shift + S to save your profile picture. I saved mine as a JPEG with maximum quality (Facebook will compress it, but there’s not much you can do about it).
After saving, you can close the document and return to the template PSD. From here we’ll repeat the same process for the timeline. Ctrl + Click on the Timeline layer thumbnail. Now select Final.
Ctrl + C to copy and Ctrl + N to open the New Document window.
The resolution you need is 851 x 315, so add those two pixels back to the height and move on by clicking OK.
Paste with Ctrl + V and use Free Transform again to fill the single row gaps at the top and the bottom.
Finally, tap out the familiar keyboard shortcut Ctrl + Shift + S and save your timeline as a high-quality JPEG.
Now you can upload the two files as, respectively, your profile pic and your timeline. If you did everything correctly, your profile will get a look that’s completely identical to the one on the PSD template. For specific details on how to create a Facebook timeline cover, check out my screencast below:
Comment Name * Email *
Δ Save my name and email and send me emails as new comments are made to this post.


![]()
