Open the Windows Home Server Console and click User Accounts. Then click Add in the left corner.
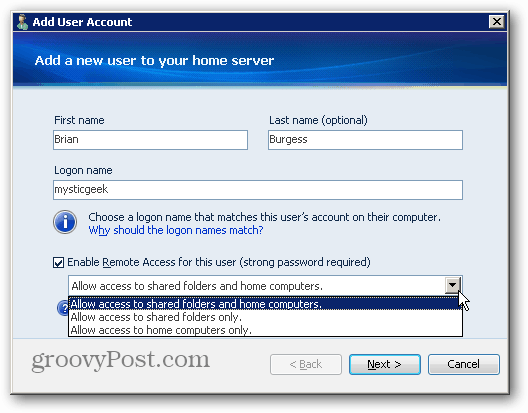
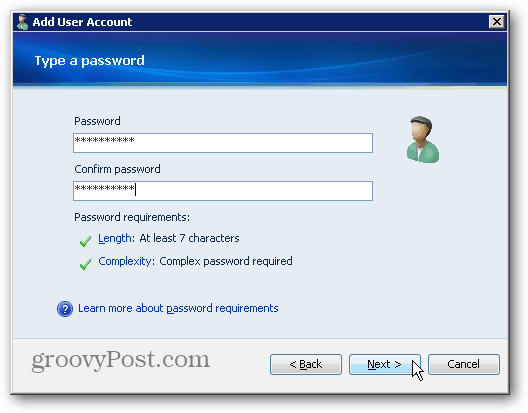
The Add User Account wizard starts. Type in the user’s first and last name as well as their logon name. Check the box if you want the user to have remote access. Then select the folders they’re able to access. Click Next. Now type in a strong password for the user twice. If you get two green check marks under Password Requirements, you’re good to go. Click Next.
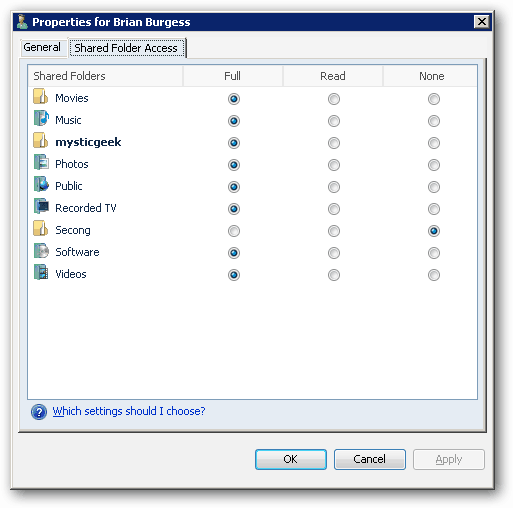
Now, set the type of access the user has to each shared folder. Choose from Full, Read or None. Here’s a breakdown of each type of access.
Full – Lets the user create, change, and delete any files in the shared folder.Read – Only lets the user read the files in the shared folder. Users with Read access cannot create, change, or delete any files in the shared folder.None – This setting doesn’t give the user any access to the folder at all.
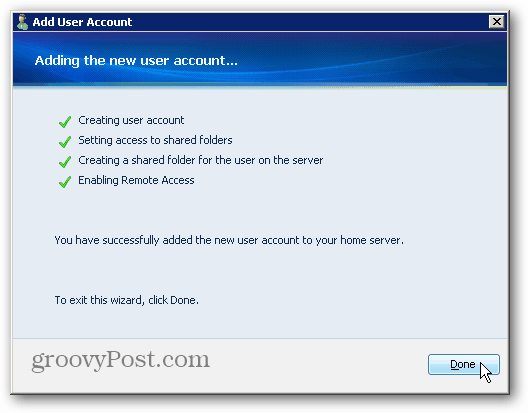
Wait a few moments while WHS adds the new user with the settings you selected. When it’s finished click Done.
Now back in the Windows Home Server Console you’ll see the new users that you’ve added.
To make changes to the user, just double click their name. The user Properties windows comes up. Here you can change folder access, username and remote access.
Comment Name * Email *
Δ Save my name and email and send me emails as new comments are made to this post.


![]()
